Customizing Jira Project Issues
Optimizing Jira Issue Management for Agile Teams
In this post I want to write about Jira, one of Atlassian’s flagship products. These days many IT companies use agile development methodologies for software development. Jira helps us use various methods from agile methodology more easily and conveniently.
In fact, since agile processes are just methodologies not principles, the composition and development process inevitably differs slightly from team to team, and since we keep trying various methods through retrospectives, it’s not rigidly defined by any rules. Jira provides features to diversely customize projects to cope with these ever-changing rules.
However, the features are so numerous and terminology so complex that those first encountering it don’t know how to use it. Probably many people are just using the basically provided Kanban or sprint features.
So today I want to explain how to customize Issues, which form the most basic unit when using Jira.
What is Jira Software?
Jira is a kind of project management solution supporting agile software development methodology provided by Australian company Atlassian. Simply it provides Kanban boards, and deeply it provides sprint-based management techniques needed for agile processes and various reports for analyzing sprints.
This seems to be what differentiates it from other project management tools like Trello or Asana. (By the way, Atlassian acquired Trello a while back)
Also, good integration with other Atlassian services like Bitbucket, Confluence, Source Tree seems nice. For example, when developing a feature in some branch then creating a Pull Request to that branch, you can automatically change the Jira-connected issue to Code Review status, and if you include Jira issue numbers in commit messages like LU-0000 first commit, that commit and branch automatically get tracked within the Jira issue.
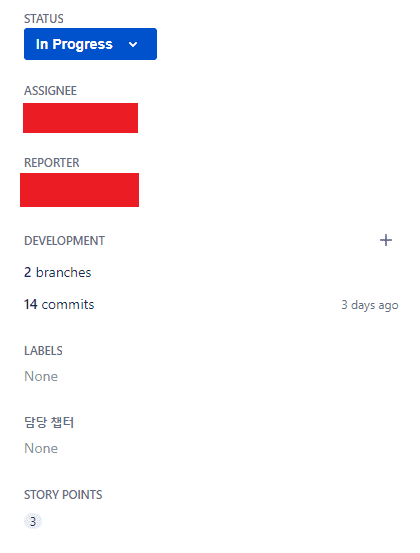 Branch and commits being tracked in an issue
The best thing about these sharing features is actually that POs’ (Product Owners) work becomes much easier. Jira’s sprint dashboard is a kind of status board. You can see in detail through branches and commits who progressed which task to what degree, and it shows real-time information like what percentage of total sprint issues are Done status, how much harder the team must run to finish this sprint.
Well, at the end of the day Jira is just a tool, and what matters most for agile is the team’s will to “work efficiently,” but it’s true that Jira provides very meticulous features.
Customizing Jira Issues
The items described in this document can only be performed by users with project Administrator privileges.
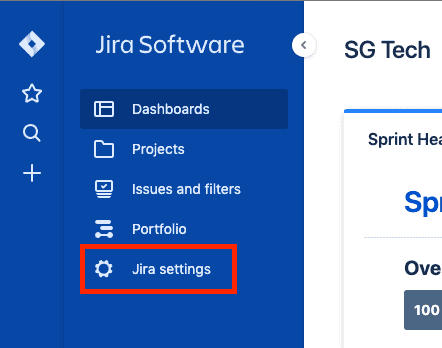
Finding Jira Settings Menu
When accessing the Jira main screen, if you’re a user with modification rights to Jira project settings, you’ll see a Jira settings menu at the very bottom of the left menu list. Accessing this menu lets you modify all settings about Jira including system, projects, issues.
Clicking the Jira settings menu and exposing the settings menu shows 5 total menus: System, Products, Projects, Issues, Apps. This post will only cover settings for Issues among these settings.
Issues Menu
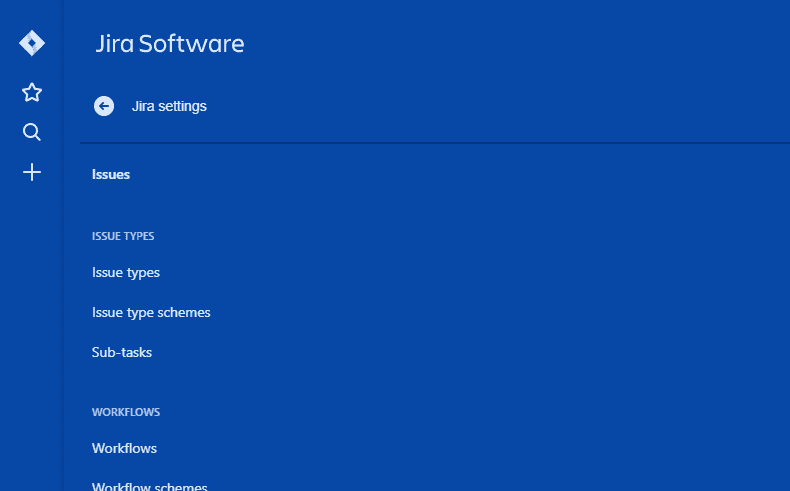
Clicking the Issues menu within Jira settings exposes numerous menus related to issues. Let’s look at them one by one.
Issue Types
Issue Types

Issue types mean types of issues available within Jira like Story, Bug, Task. These issue types are broadly divided into Standard type and Sub-Task type.
| Issue Type | Description |
|---|---|
| Standard | Issues that can have child issues as parent issues |
| Sub-Task | Issues that can only exist as child issues of parent issues. Cannot exist independently |
The agile team at my current workplace uses 7 total issue types: Bug, Epic, Research, Story, Sustain, Task, Sub-task. For the meaning of each issue type, read the description written below the issue type.
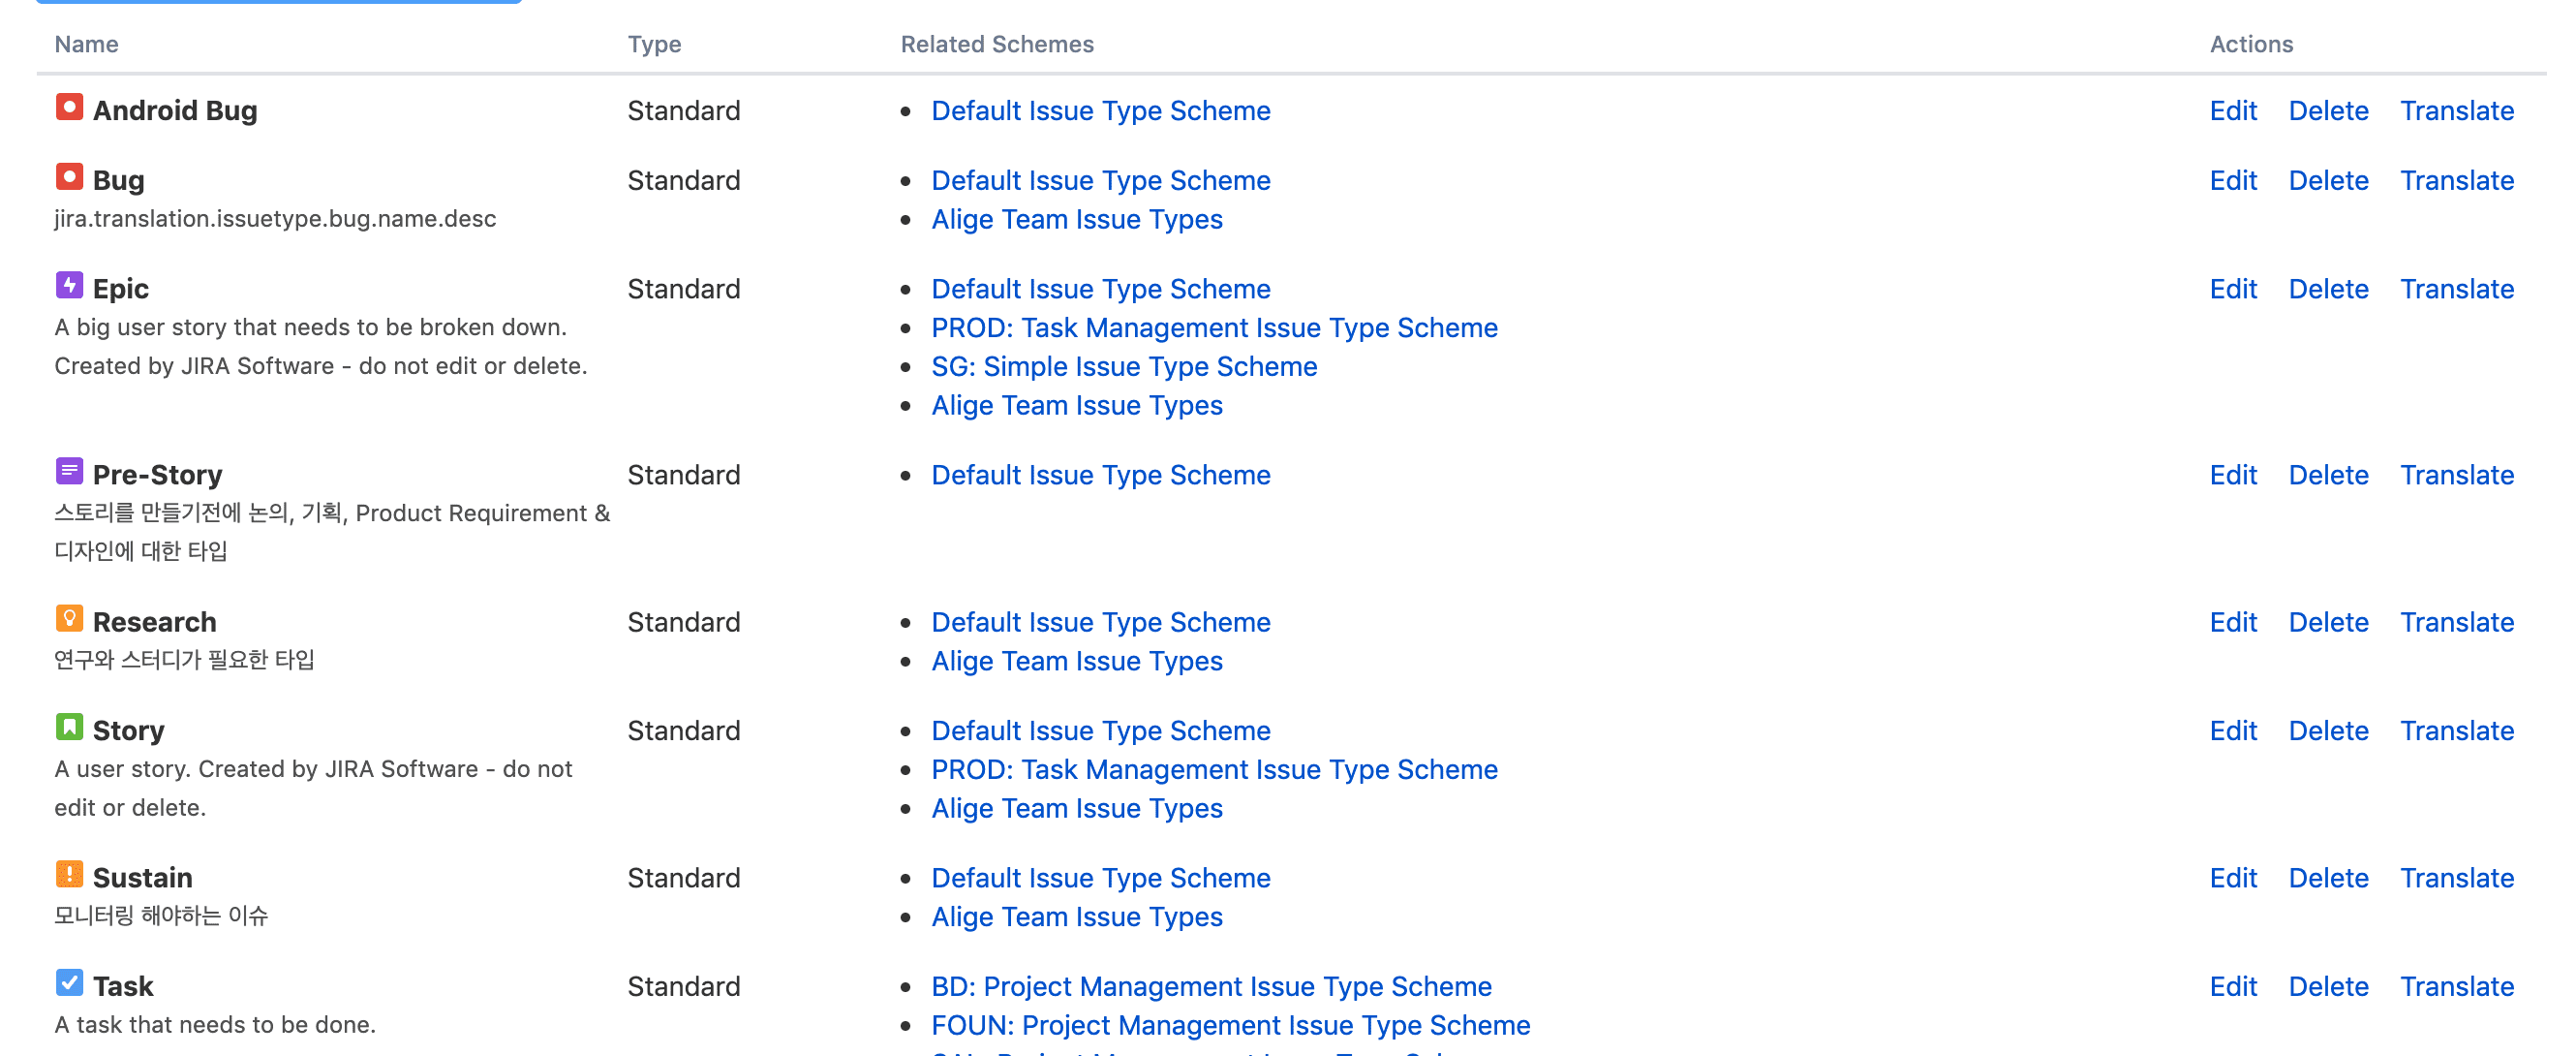
Sadly it’s in English, but it’s a readable level. If you don’t want to make other people also experience the pain of reading English descriptions like this, we can sacrifice ourselves and translate everything to Korean. Issue types can be modified and deleted through the menu in the last Actions column.
- Edit: Modify the issue type’s name, description, icon, etc.
- Translate: Set translation content for issue type name and description.
- Delete: Try not to use this. Don’t even look at it.
Issue Type Schemes
Issue type schemes are a kind of group bundling issue types. When applying issue types to each project, you assign issue type schemes rather than assigning each issue type individually. Also, the Projects column on the issue type scheme settings page specifies which projects are using that scheme, so make sure to check this part when modifying and deleting.
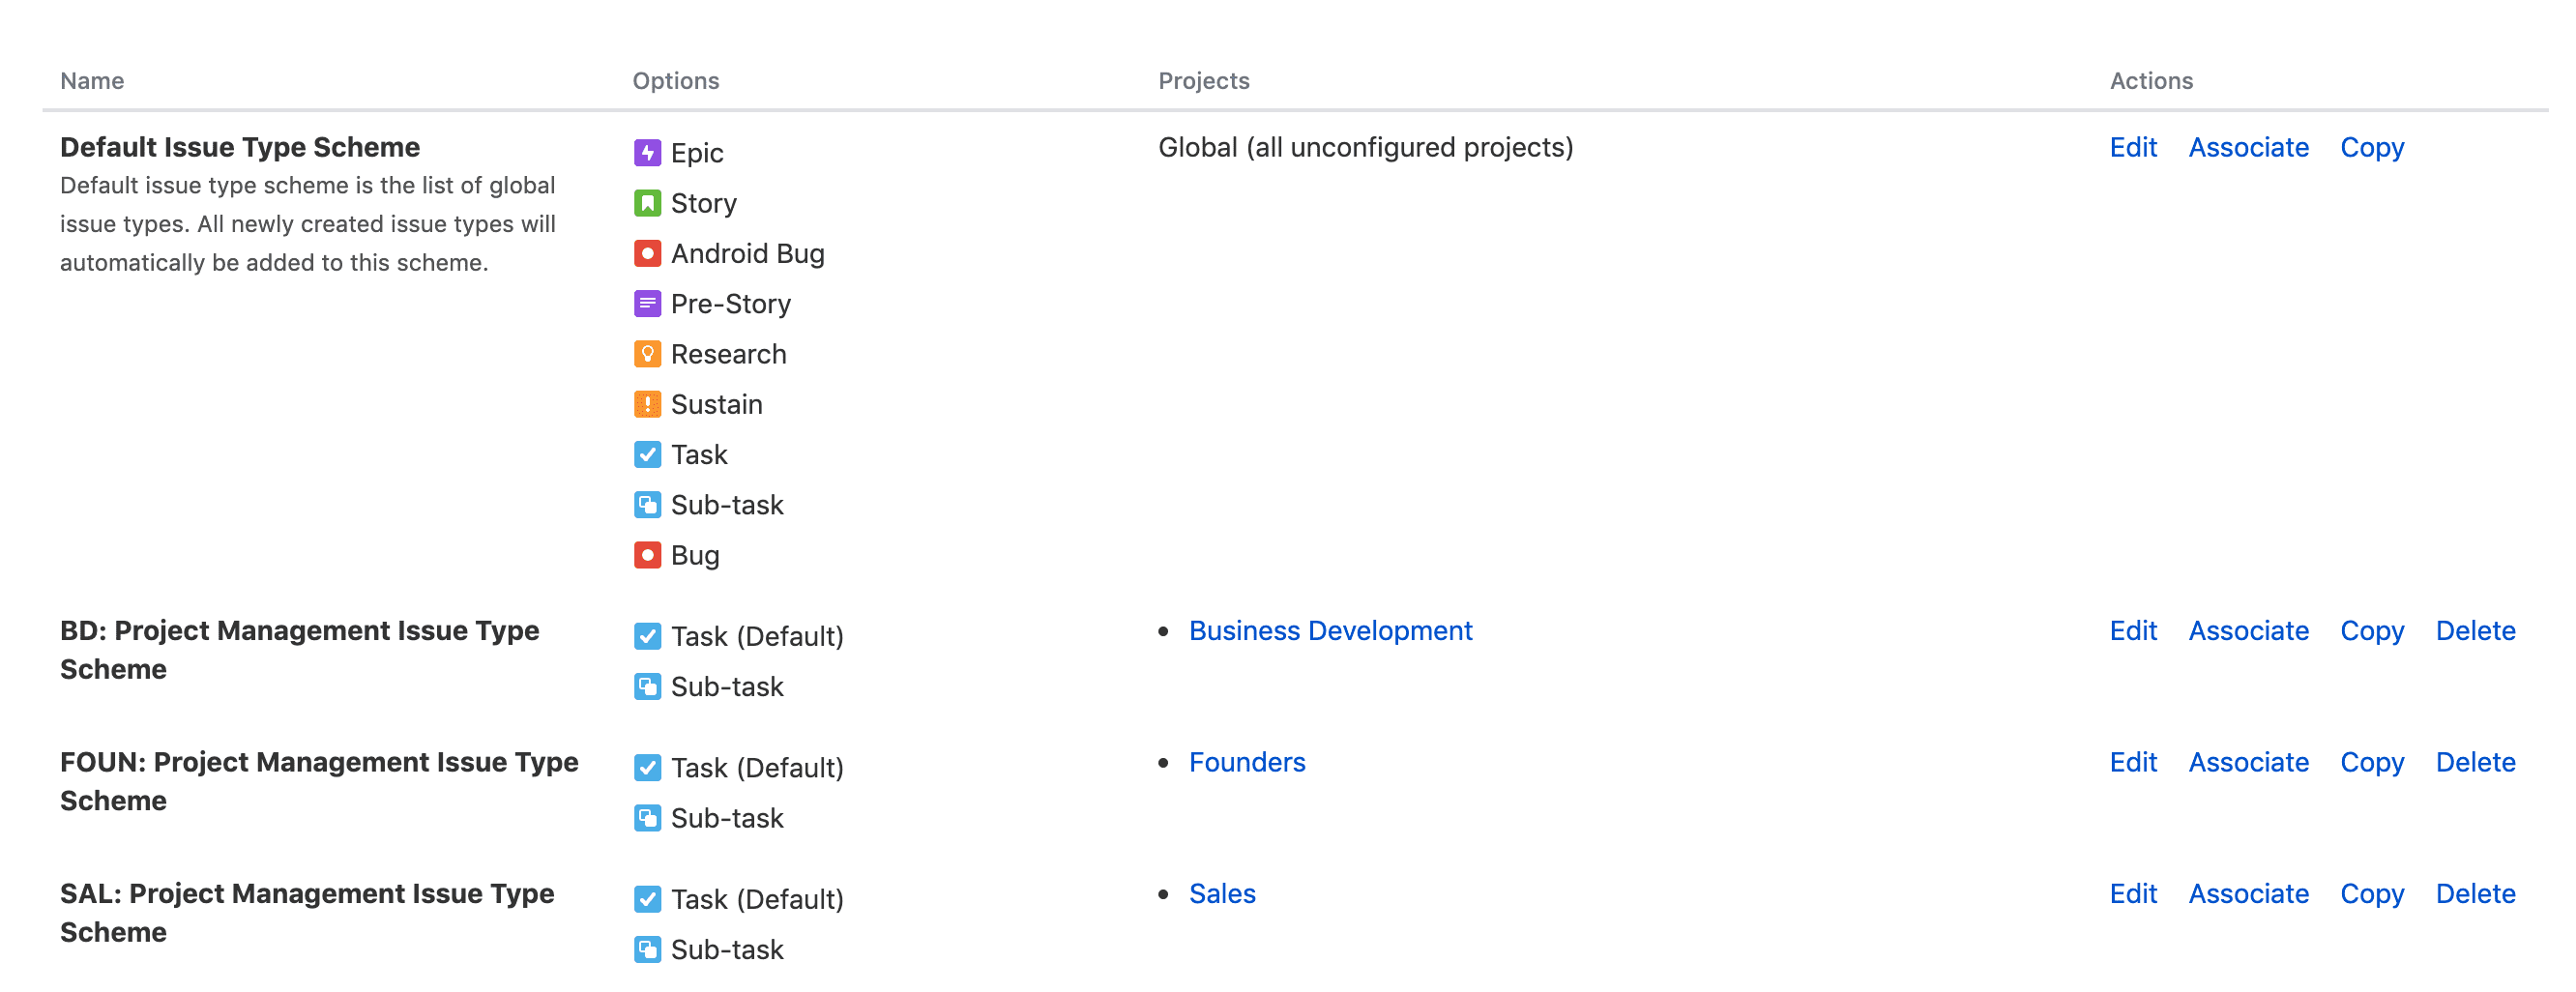
Like issue types, issue type schemes can also be modified, deleted, assigned, and copied through the menu in the last Actions column.
- Edit - Set the issue type scheme’s name, description, default issue type, types of issue types to use.
- Associate - Assign the issue type scheme to a project.
- Copy - Copy the issue type scheme.
- Delete - Delete the issue type scheme.
Sub-tasks
Manages issue types for sub-tasks. If you haven’t configured anything, you’re set to only use the basically provided issue type named Sub-task.
Workflows
Workflows mean the work flow of issues within Jira projects. To Do, In Progress, Done correspond to this.
Workflows
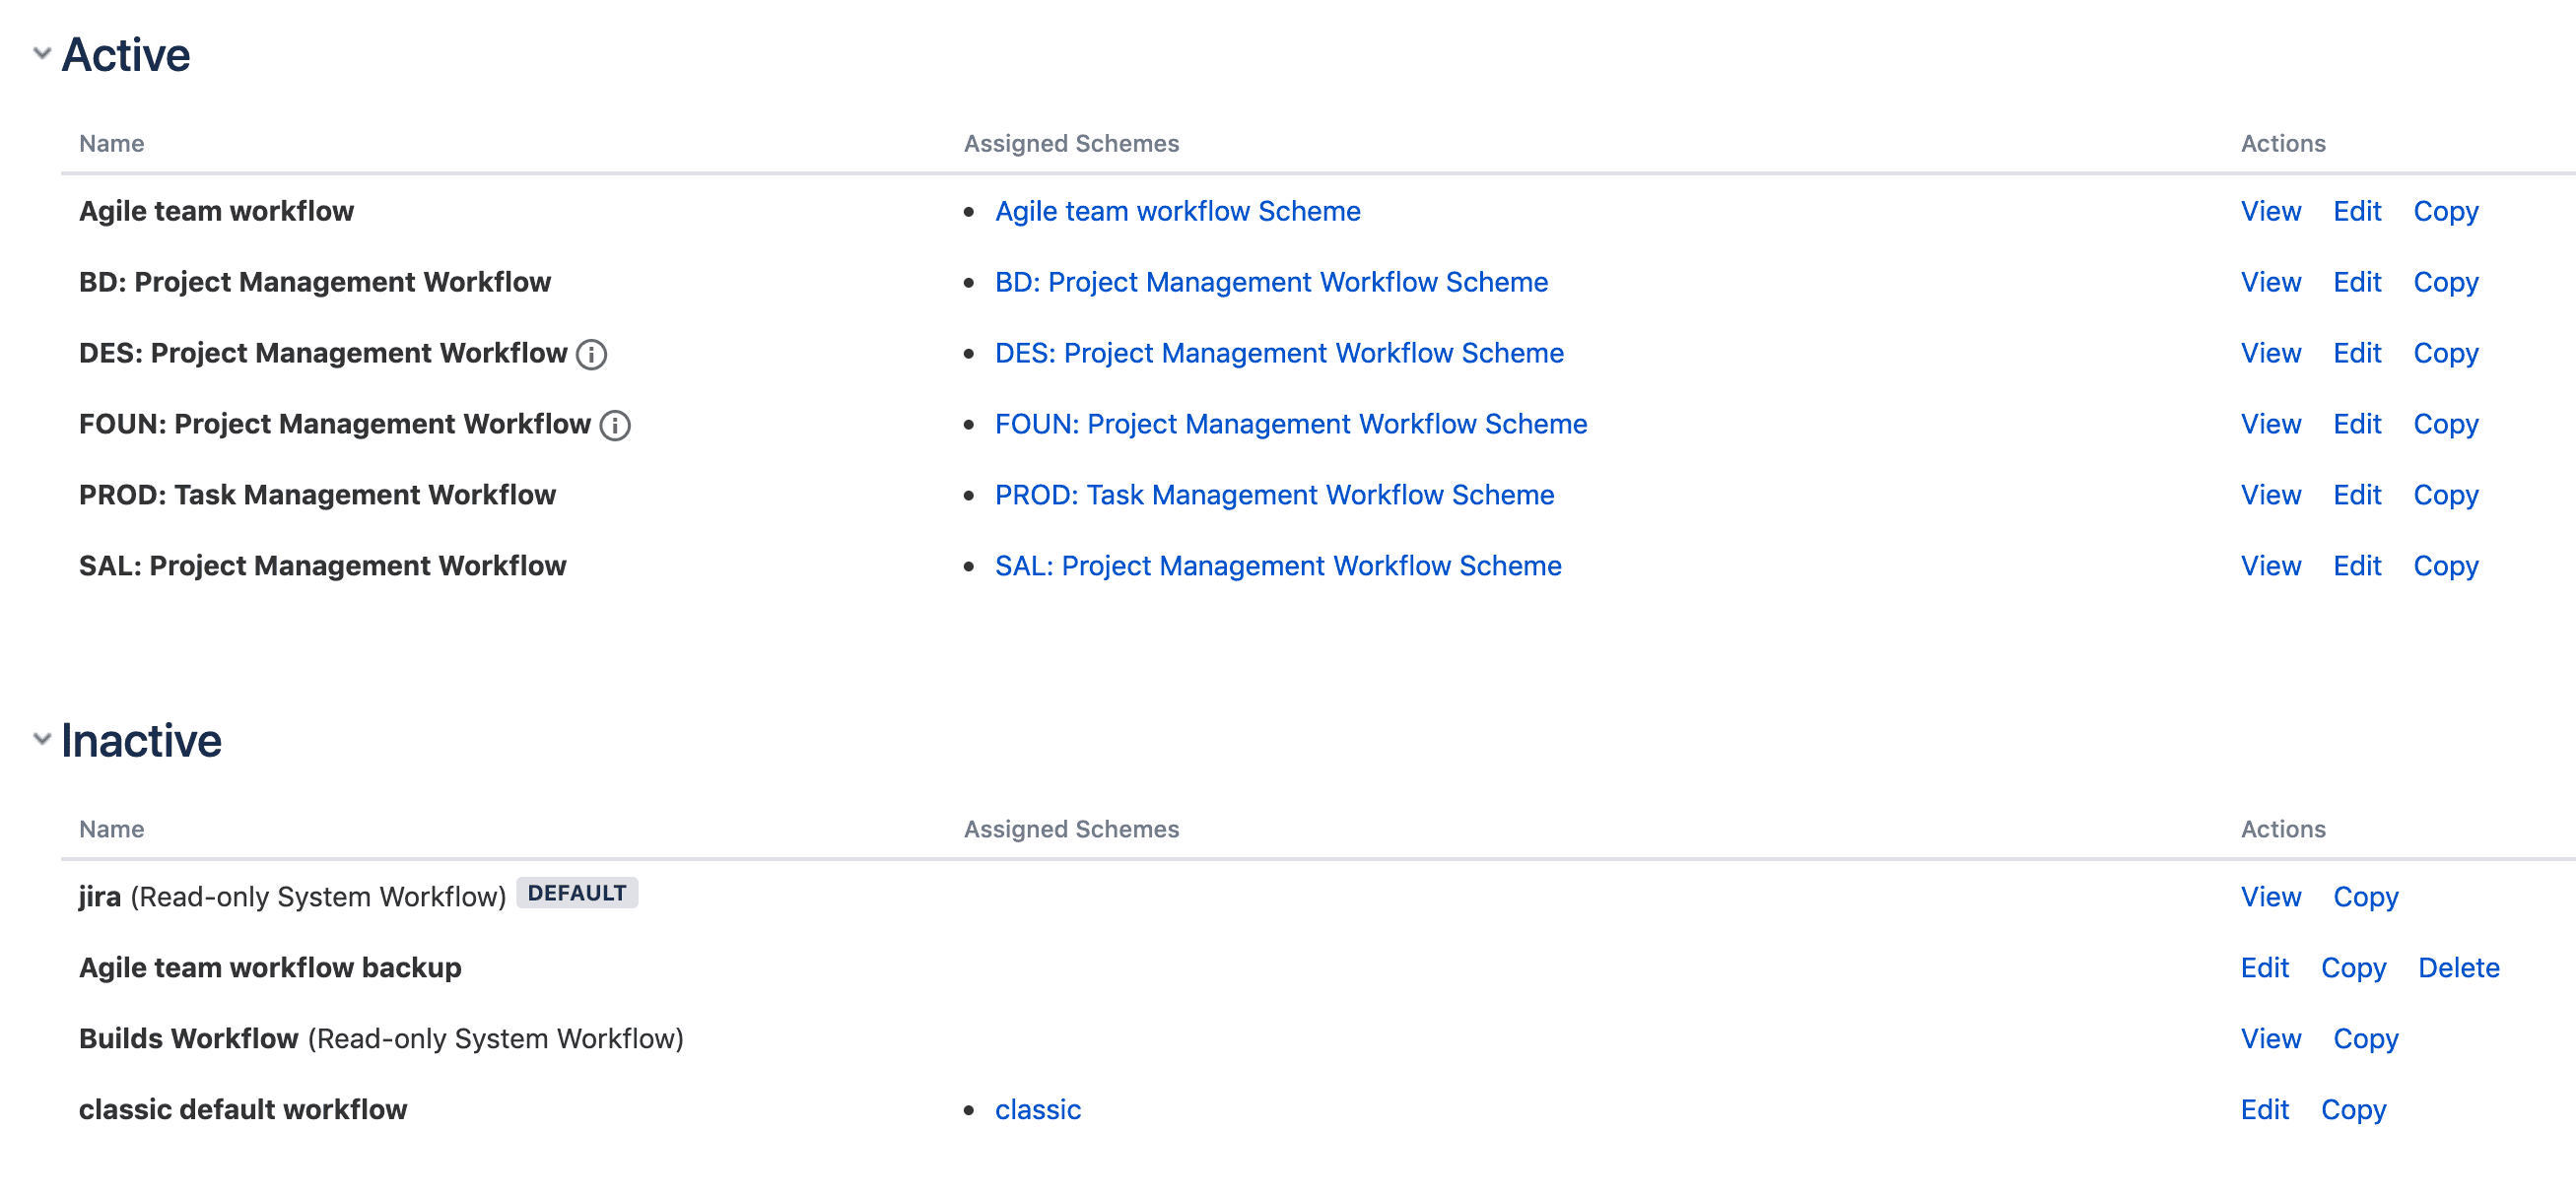
To see workflows in detail, click the View button in the Actions column. Workflows can be viewed in two ways: diagram and text. The text method is inconvenient for reading work flow, so I recommend viewing in diagram mode.
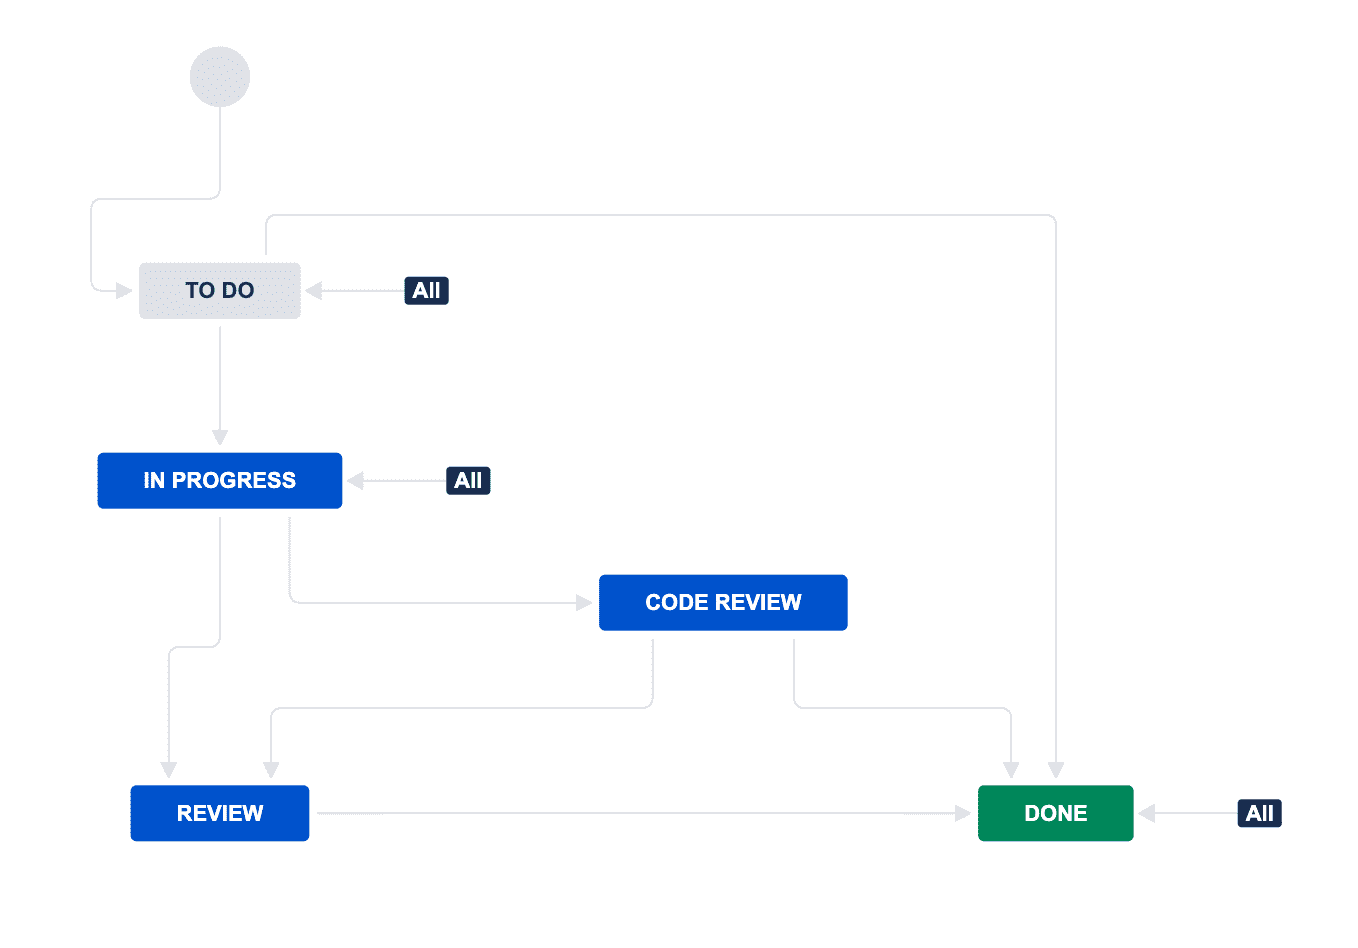
Workflows are divided into Status and Transition. Rectangles like To Do, Done mean Status, and arrows connecting those rectangles are Transitions. To modify a workflow, click the Edit button at top right. Then a workflow modification screen using diagram UI is exposed.
Since it provides UX similar to PowerPoint or Google Draw.io, you can modify it without difficulty even if it’s your first time.
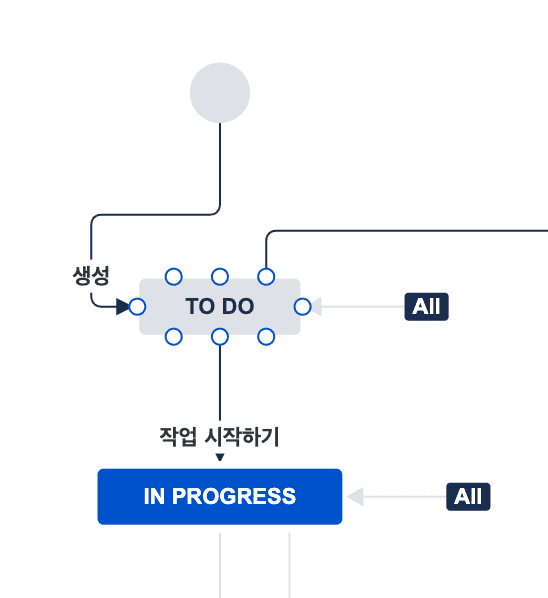
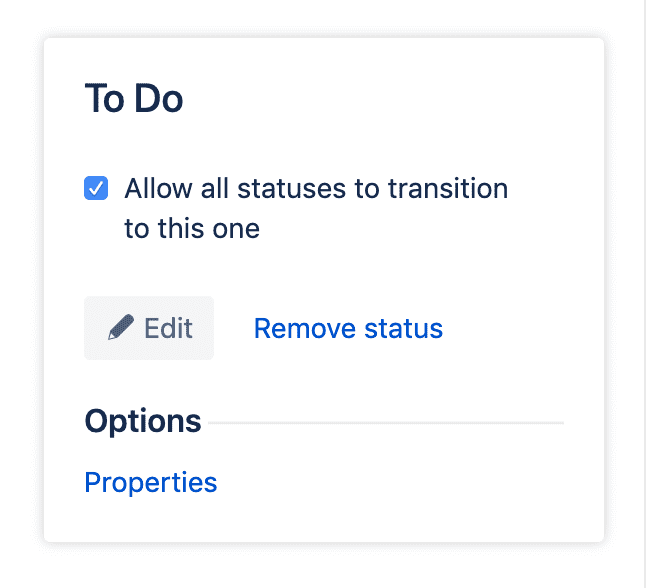
Clicking a Status exposes a window where you can modify the Status’s information. Inside this window, checking Allow all statuses to transition to this one allows freely changing to the current Status regardless of what Status the issue has.
Clicking a Transition exposes a Transition settings window. In this window you can set the Transition’s name, properties, triggers, conditions, validators, etc. Triggers and conditions especially are very useful.
- Triggers - Automatically execute that Transition when some event occurs. (e.g. Automatically change issue to Code Review status when Pull Request is created)
- Conditions - Set conditions for this Transition to execute. (e.g. To change issue to Done, all Reporters assigned to the issue must agree)
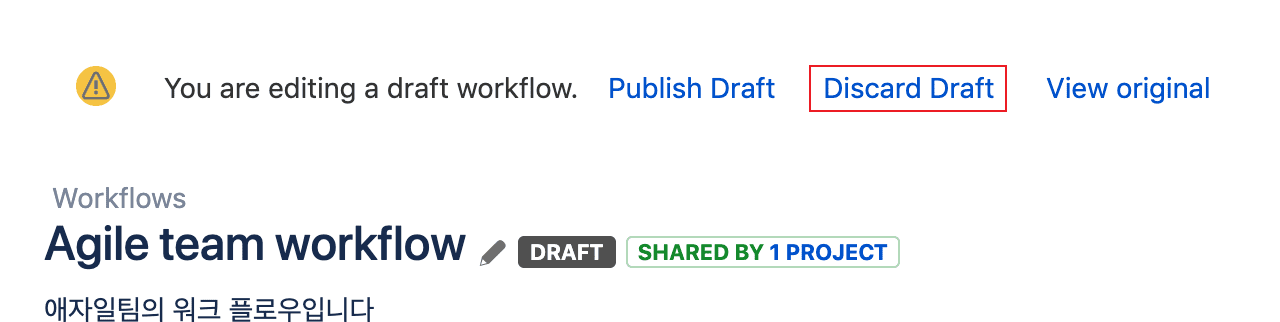
After finishing all modifications, click Publish Draft at the top to deploy the settings. At this time a window asking whether to back up the previous workflow is exposed, so whether to back up or not is just your own judgment.
 Save edited issues in my heart!
And once you click the Edit button and enter the workflow modification screen, Jira automatically saves the current state even if you haven’t modified anything. So even if you haven’t modified anything, make sure to click the Discard Draft button at the top to end the modification state.
Workflow schemes
Jira allows using different workflows for each issue type in a project. Workflow schemes are groups that assign workflows per issue type.
- Bug:
To Do → In Progress → Resolved - Story:
To Do → In Progress → Test → Review → Deployed - Research:
To Do → In Progress → Done
You can apply different workflows per issue type like this.
Screens
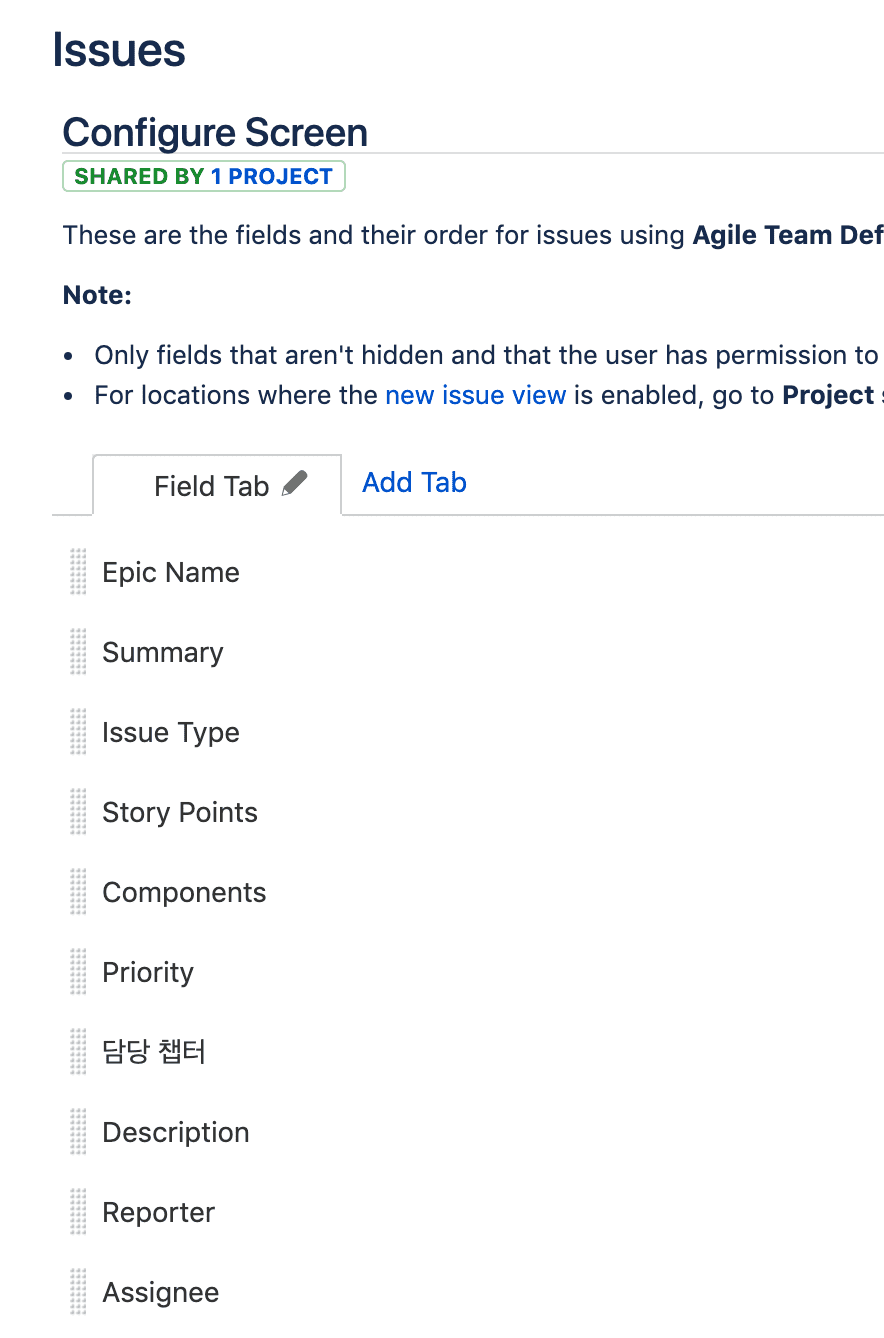
Screens mean the screen showing detailed information of an issue when you click an issue on the scrum board. This menu is more intuitive compared to other menus, so I’ll mainly show example screenshots rather than explanations.
Screens
The screens menu lets you set tabs and fields that will go into that screen.
Screen Schemes
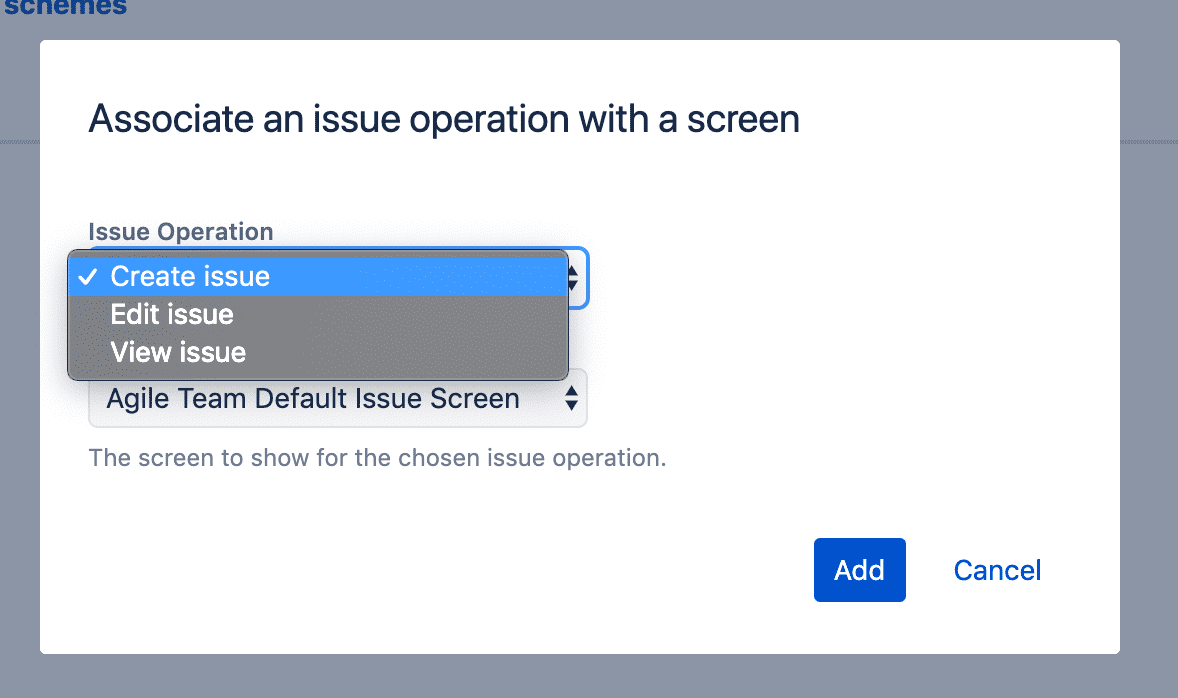
You can assign different screens when creating, when modifying, when viewing issues. Basically set to Default.
Since practitioners often create issues when planning, it’s good to have them input only minimal fields to create quickly, then use this when POs later review issue contents and write in detail.
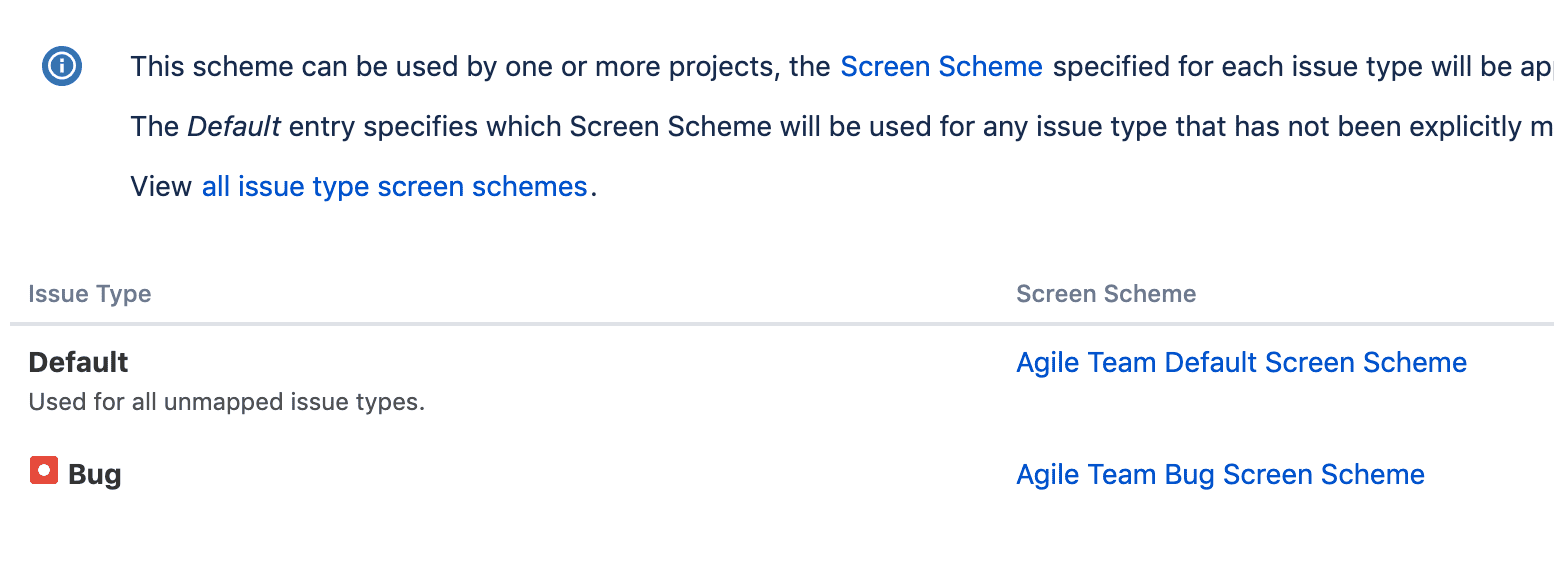
Issue Type Screen Schemes
You can assign different screen schemes per issue type. Basically divided into Default issues and Bug issues. For Bugs, due to issue characteristics there are many cases where you can’t estimate, and since it’s fixing rather than developing something, the information needed for issues differs a lot from general issues, so they seem separated.
Note that you’re assigning screen schemes not screens.
Fields
This is where you can modify items that go into screens. Add items in the Custom Fields menu and bring them to use in Screens explained above.
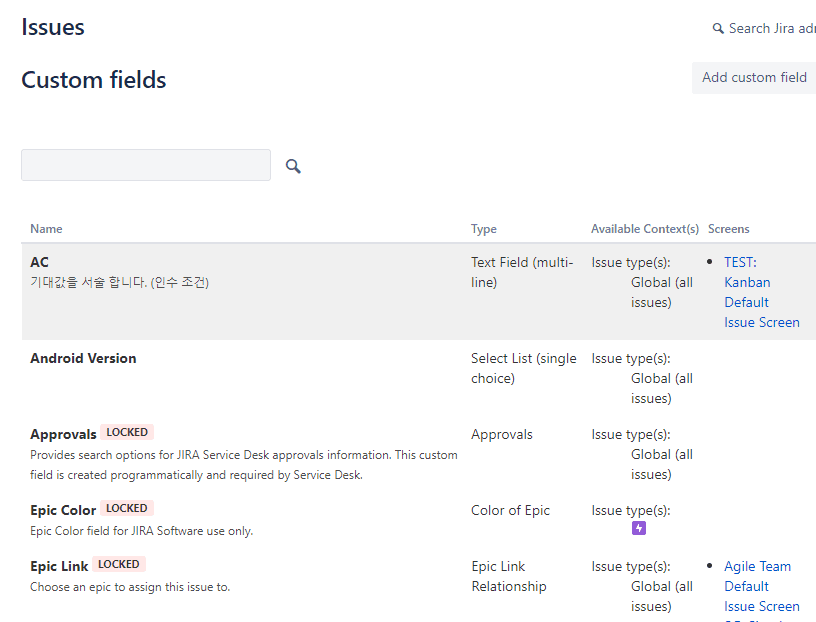
Clicking Add custom field at the top lets you select various forms. Form types include Standard and Advanced, but I’ve only used Standard. Actually using just Standard forms lets you express most information.
Issue Features
Time Tracking
Time tracking is a feature that tracks how long it took to perform that issue through work logs left when progressing issues. But since leaving work logs every time is a more cumbersome task than you’d think, it didn’t settle well within the team. (Everyone favors comments…)
Issue Linking
In issue linking you can modify content that will go into fields defining issue relationships. One relationship can set two detailed relationships: active and passive. Jira basically provides 6 statuses.
- Blocks -
blocks/is blocked by - Cloners -
clones/is cloned by - Duplicate -
duplicates/is duplicated by - Issue split -
split to/split from - Problem/Incident -
causes/is caused by - Relates -
relates to
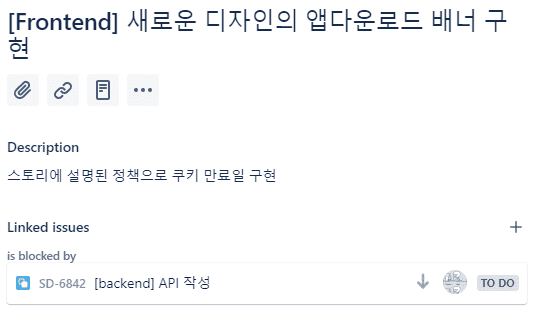
If there are issue A and issue B, there may be situations where A issue must finish first before you can work on B issue. For example, situations like A is a DB schema change task and B is developing a REST API. Since you don’t know how the model will change, you can’t rashly develop the API, right?
In this case you can express as A blocks B or B is blocked by A. If you put a blocks link from A issue to B issue, is blocked by automatically gets added to B issue.
A blocks B
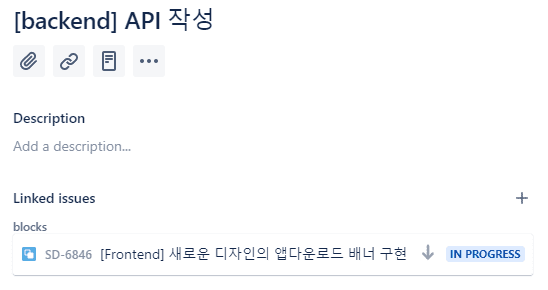
B is blocked by A
The issue linking feature can explicitly tell that issue’s assignee where this issue derived from or what tasks must precede it, so using it well can save considerable communication costs.
That’s all for this post on customizing JIRA project issues.