Simply Applying HTTP/2 with AWS
Advantages of HTTP/2 and How to Easily Enable It on AWS

In this post I want to explain how to apply HTTP/2 protocol in AWS (Amazon Web Service) environments. Since AWS’s CloudFront and Application Load Balancer provide features that can natively use HTTP/2 protocol, you can simply apply HTTP/2 protocol without separate work.
What is HTTP/2?
HTTP/1 is a protocol that’s almost 30 years old, and since it was designed as a protocol for documents rather than web applications, in environments like modern web applications with heavy payloads and frequent communication, there are many inefficient aspects.
So HTTP/2 was devised with the following goals to support modern communication:
- Reduce latency through multiplexing full requests and responses
- Minimize protocol overhead through efficient compression of bloated HTTP header fields
- Support request prioritization
- Support server push
HTTP/2 was designed to share all core concepts (methods, status codes, URIs and header fields) without modifying applications using existing HTTP/1 protocol. Instead, HTTP/2 improved communication efficiency by modifying data frames and transmission methods between clients and servers.
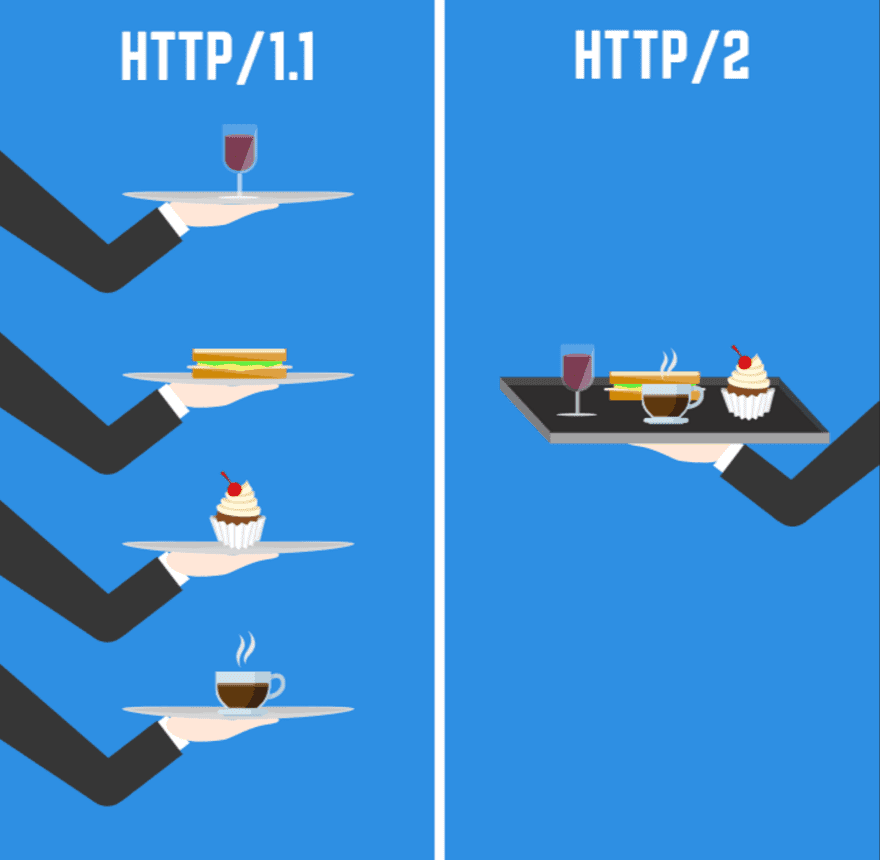
Also, what has the biggest effect in client-server communication is that response multiplexing is officially supported. This means you can send and receive multiple resources with just one connection.
 [Source] csstrick.com
In HTTP/1, protocol-level response multiplexing wasn’t supported and browsers were responsible for parallel processing of responses. Therefore, the number of requests that could be processed in parallel differed depending on browser policy.
- Internet Explorer: 10-11 per origin
- Chrome: 6 per origin
- Firefox: 6 per origin
- Opera: 6 per origin
So frontend developers bundled all JavaScript and CSS files into one bundle to make files like index.js or style.css to reduce resource requests as much as possible during application initialization, used techniques like Minify or Uglify to reduce capacity as much as possible, and used sprite methods of downloading one large image and masking it to avoid requesting multiple images.
But HTTP/2 can process up to 128 parallel requests per origin, so now we can create possibilities for performance improvements we couldn’t do in HTTP/1.1, like dividing into multiple small files instead of one large file and requesting and receiving them simultaneously.
Using HTTP/2 in AWS Cloud Front
AWS started supporting HTTP/2 in Cloud Front from September 2016. You can change from HTTP/1.1 to HTTP/2 with just simple settings. It also has the feature of changing protocol to HTTP/1.1 and responding if receiving requests from lower version browsers that don’t support HTTP/2.
The AWS CloudFront HTTP/2 setup manual explains in detail how to set up HTTP/2, so there was no difficulty at all in the process of changing protocols.
Modifying CloudFront Distributions
First, moving to the Cloud Front dashboard shows a list of currently registered distributions. Select the distribution you want to apply HTTP/2 protocol to, then select Distribution Settings at the top.

Clicking Distribution Settings and entering the distribution settings screen shows a screen with various information about the current distribution. This information also contains information about protocols this distribution supports.

Now let’s click the Edit button at the top to change the distribution’s settings. Scrolling down, there’s an item called Supported HTTP Versions.

Now just select the first item HTTP/2, HTTP/1.1, HTTP/1.0.
Using HTTP/2 in Elastic Beanstalk
Elastic Beanstalk is a service that can easily deploy or control familiar web applications or services like Web servers or Workers. When creating environments in Elastic Beanstalk, if you set the language or server engine to use, you can copy that configuration to other environments, and troublesome tasks like Auto Scaling or Load Balancing that need annoying settings are done automatically by just touching a few simple settings, so it’s honey.
Also, if you create a .ebextensions directory in the project root and put shell script files inside, you can execute those scripts every deployment according to file sort order, making it very flexible. (Very useful when node-sass causes trouble and needs rebuilding)
When creating environments, you can choose one load balancer between Classic Load Balancer and Application Load Balancer - Classic Load Balancer means the existing ELB. If you want to use HTTP/2 in Elastic Beanstalk, choose Application Load Balancer. Of course there’s a method of choosing ELB and setting it up directly, but I didn’t choose the difficult path on purpose.
What is Application Load Balancer?
AWS announced Application Load Balancer (ALB) operating at L7 (Application) layer in 2016.
The existing load balancer Elastic Load Balancer (ELB) operates at L4 (Network) layer, so it couldn’t recognize protocols used in Application Layer like HTTP or HTTPS and couldn’t flexibly handle them accordingly, but since ALB operates at Application layer, the advantage is it can directly examine HTTP headers and do flexible load distribution accordingly.
For example, even sending requests to the same host, flexible routing is possible like sending to server a if sending requests to /a path, sending to server b if sending requests to /b path.
But what’s best of all, as I explained above, is that it natively supports HTTP/2 protocol and WebSocket. If you want to use HTTP/2 protocol in environments that were using existing ELB, i.e. Classic Load Balancer, you must set it up directly or migrate to ALB.
But even migrating load balancers doesn’t automatically connect with instances connected to existing ELB, so if you’re using Elastic Beanstalk, just recreating the environment is good for mental health. (Person who was disappointed after trying to go easy at first)
Configuration
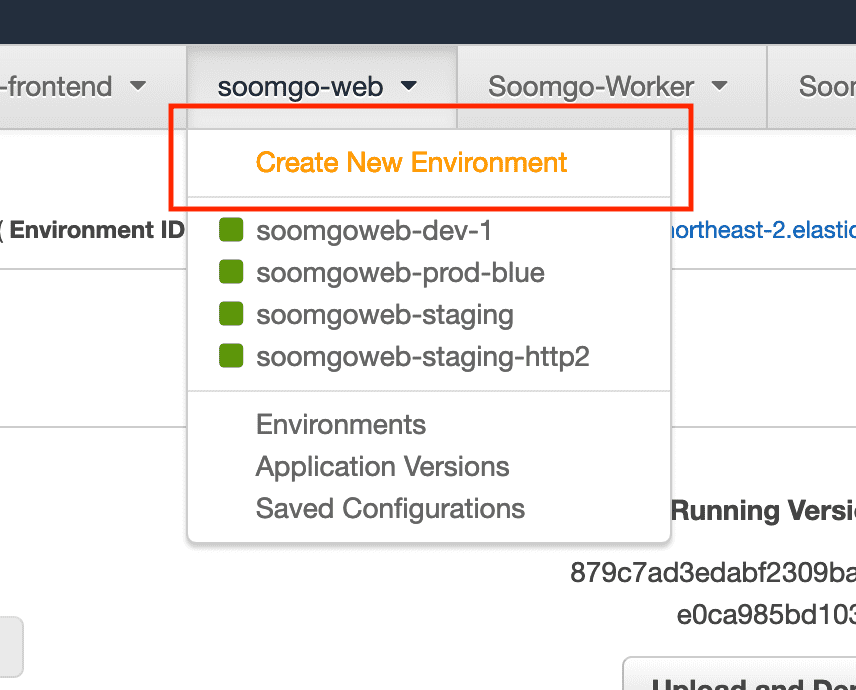
First, access Elastic Beanstalk environment and create a new environment.
After that, selecting Web server environment moves to a screen where you can do simple settings like environment name or language to use.
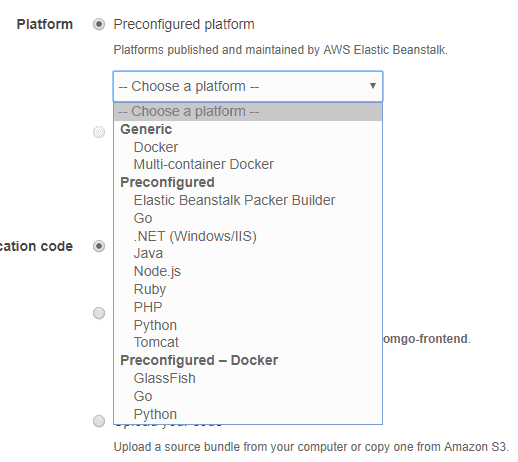
Elastic Beanstalk provides various languages, so pick and choose to taste. After doing basic settings like this and clicking Configure more options at the bottom, you can move to a screen where you can do more detailed settings.

If your hand slips and you click Create environment, you’ll waste about 10 minutes while the environment is being created, so click with eyes wide open.
If you clicked properly, you’ll move to the detail settings screen. Checking Configuration presets at the top, probably Low cost is selected as the default value. In this option you can’t use load balancers, so we need to select Custom configuration.

Selecting the Custom configuration option, the Modify button on the Load balancer card at the bottom should be activated. Clicking that button, finally a screen appears where you can select a load balancer.

All 3 look delicious but you can only eat one at a time, so don’t be greedy and select Application Load Balancer. And scrolling down a bit, you’ll see load balancer setting menus.
Among these, we need to create a Listener. You can think of ALB’s listener as a process that confirms requests using configured protocols or ports. Since default settings only have a listener for requests coming to port 80 using HTTP protocol, we just need to make a listener for requests coming to port 443 using HTTPS protocol.

If you created a listener, click the Save button at the bottom to save load balancer settings, configure other settings to taste, then click Create environment and finally the environment starts going up. By the way, it takes quite a while.
Didn’t do separate server settings?
You don’t need to. If ALB has an HTTPS listener, this listener handles it automatically. If the browser is a browser that supports HTTP/2, the listener will also respond with HTTP/2, and if it’s a browser that only supports HTTP/1.1 Internet Explorer, the listener will also respond with HTTP/1.1 protocol.
And even if the HTTPS listener receives HTTP/2 requests, it communicates with instances connected to the load balancer using respective HTTP/1.1 protocols, so on the server you just handle HTTP/1.1 as usual.
For details, read HTTP Connections in the Elastic Load Balancing User Guide.
HTTP/2, Did It Apply Well?
If you created an environment, that’s the end. The simplest way to test is using curl. You can request the environment you created or just poke anywhere. More services than you think use HTTP/2.
$ curl --http2 -I https://www.naver.com/
HTTP/2 200
server: NWS
date: Thu, 13 Jun 2019 14:59:09 GMT
content-type: text/html; charset=UTF-8
cache-control: no-cache, no-store, must-revalidate
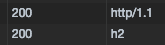
pragma: no-cacheIf you use Chrome browser, there’s also the method of installing the HTTP/2 and SPDY indicator Chrome extension.

This cute icon will tell you whether HTTP/2 or SPDY protocol is being used. But I don’t think I’ve seen anywhere besides Google use SPDY yet…?
Or you can activate the Protocol column by right-clicking on the table head in Chrome browser’s developer tools Network tab.
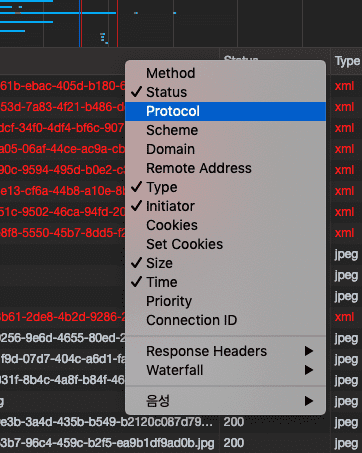
Then resources received by communicating with HTTP/2 protocol in the network tab are marked as h2.
Let’s Compare with Waterfall
Left is HTTP/1.1, right is HTTP/2. The red line on the HTTP/2 side is an image request error, but it’s a 403 error occurring due to resource origin issues in the staging environment, so you can ignore it.
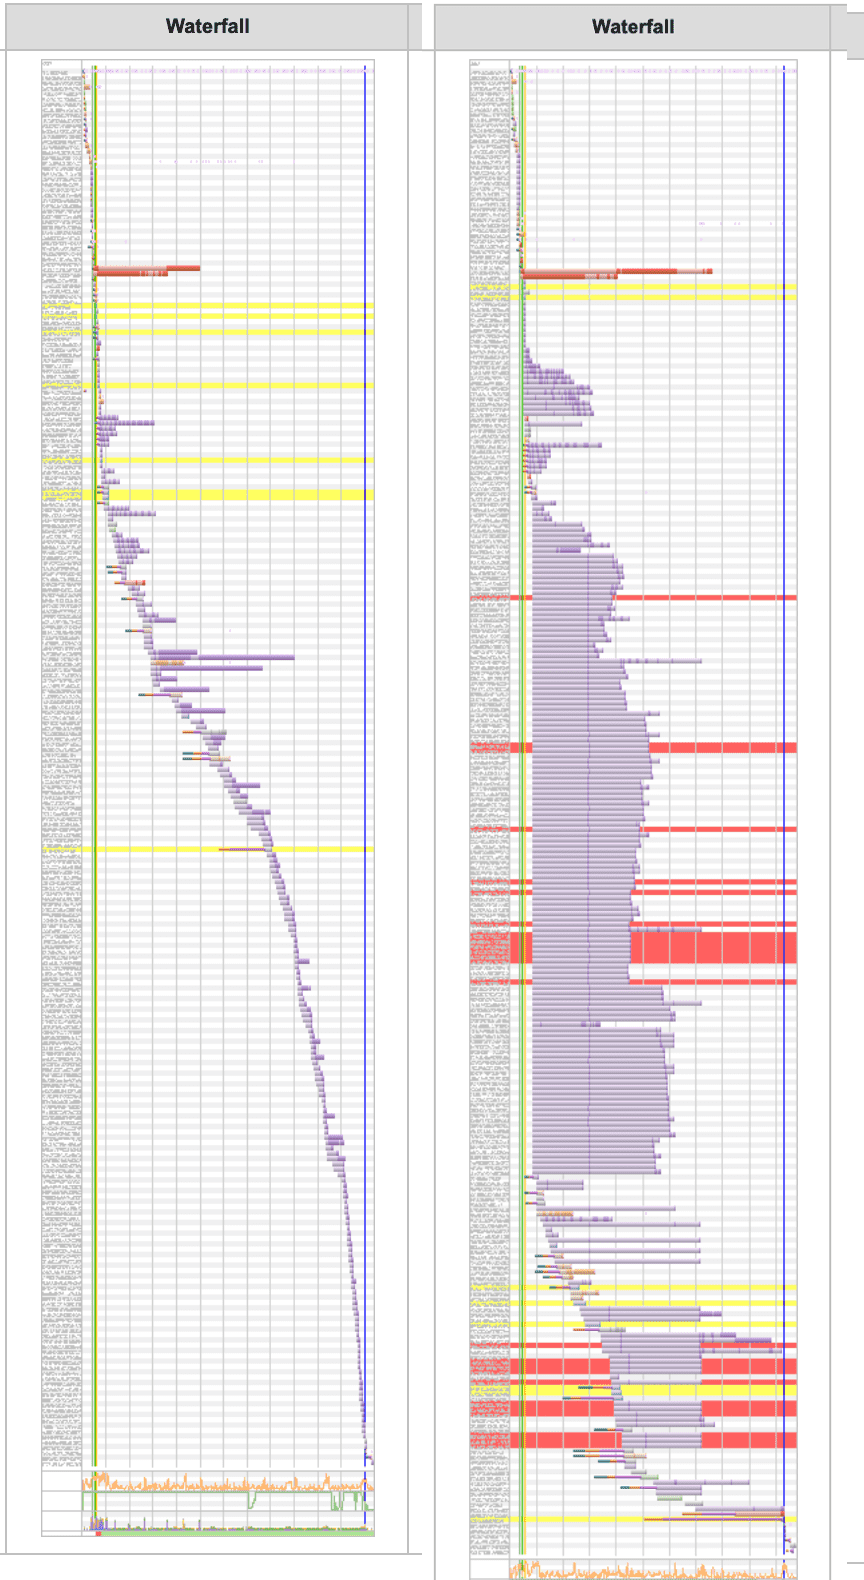
You can confirm that the HTTP/2 side’s Waterfall is processing a considerable number of requests simultaneously. Using HTTP/2’s characteristics like this, you can reduce file capacity by chunking JavaScript files that were being bundled into one into multiple pieces, or shorten loading speed a bit more by receiving images that were being used as sprites simultaneously through individual requests.
That’s all for this post on simply applying HTTP/2 with AWS.
관련 포스팅 보러가기
Why we need to know about CORS?
Programming/Network/WebHTTP Status Codes: The Server's Way of Talking Back
Programming/Network/ArchitectureWhy Did HTTP/3 Choose UDP?
Programming/NetworkBasic Git for Newbies - Version Management
Programming/TutorialBasic Git for Newbies - Getting Started
Programming/Tutorial